Members Only includes a few blocks to help you build great membership pages with the WordPress block editor (also known as Gutenberg). Let’s take a look at what’s included.
Login Form block
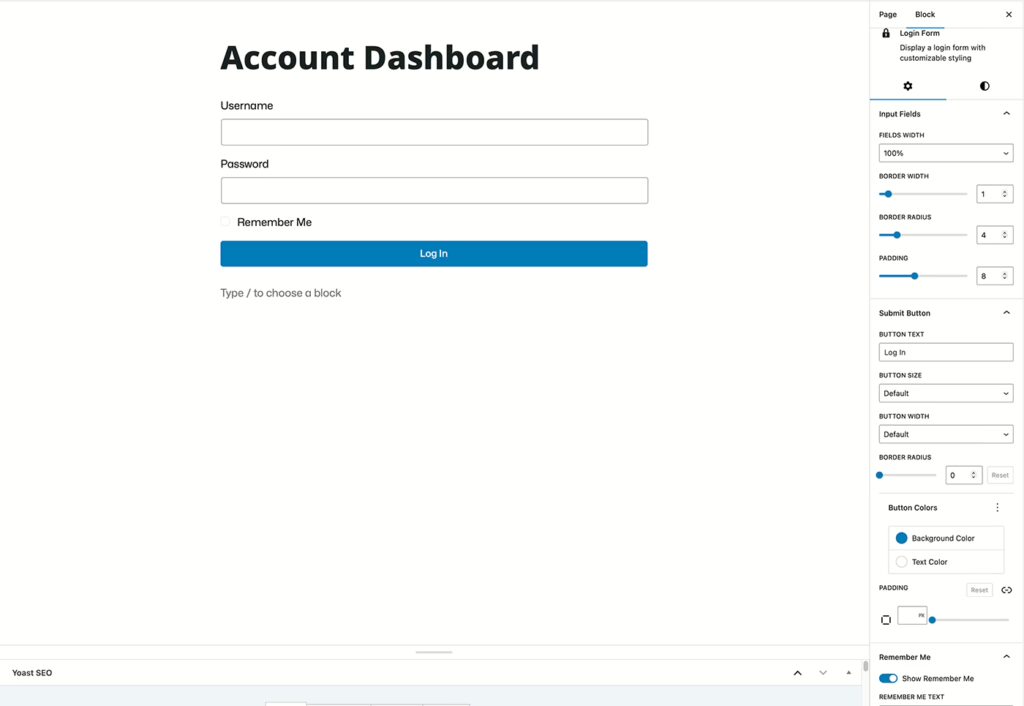
Click screenshot to enlarge
The Login Form block lets you put a nice, stylized login form on any post or page on your site. This helps you integrate the login process with your site’s design and workflow, instead of sending them to an unbranded wp-login.php page.
The Login Form block gives you many options to control the design and functionality of the block. Some of these options are:
- Redirect After Login (send users to specific page after they sign in)
- Width of fields (Username/Password)
- Border Width
- Border Radius
- Padding
- Button text, size, colors, and width
- Whether the Remember Me box should be checked by default
- Font sizes and line heights
The Login Form block works well when used in conjunction with the Account block on the same page.
Redirect after login
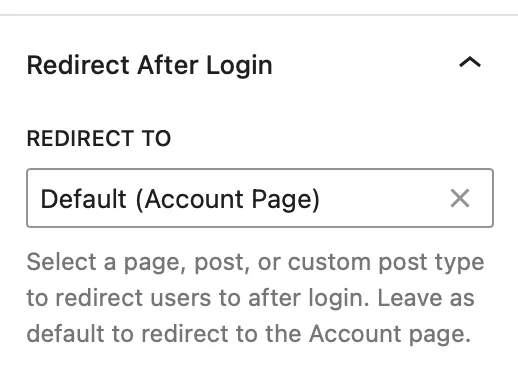
By default, logging in will send users to the Account page you have defined in the Members Only settings. In v1.6.0, the Login Form block can optionally redirect users to a page of your choosing—useful for sending members directly to a dashboard, a protected page, or a “welcome back” screen.
Tip: If you’re using a combined “Login + Account” page, leave this blank so returning members stay on that page and immediately see their Account dashboard.
Account block
The Account block provides a dashboard for members to manage their Stripe subscriptions and view previous cancelled or expired subscriptions — and (as of v1.6.0) it also displays Access Pass information.
When a user has an active membership, they can see the plan they have, its status, its cost, and when their subscription began and when it renews. They can also download a copy of their latest invoice in PDF format, and finally they can cancel any active memberships.
Access Passes
If you grant access using Access Passes, the Account block now shows those alongside Stripe subscriptions, including:
- Status: Active, Expired, or Upcoming
- Start date
- End date
This makes it easy for members to understand whether they currently have access (and when that access begins/ends), even when their access wasn’t purchased through Stripe.
The block provides you options to control the colors, font size, line height, and spacing.
When a user is in a logged out state, the Account block shows nothing. This is useful when used in conjunction with the Login Form block, which shows a login form when users are logged out but shows nothing when they are logged in. This makes it easy to build a single page for login and account management.
Stripe Checkout block
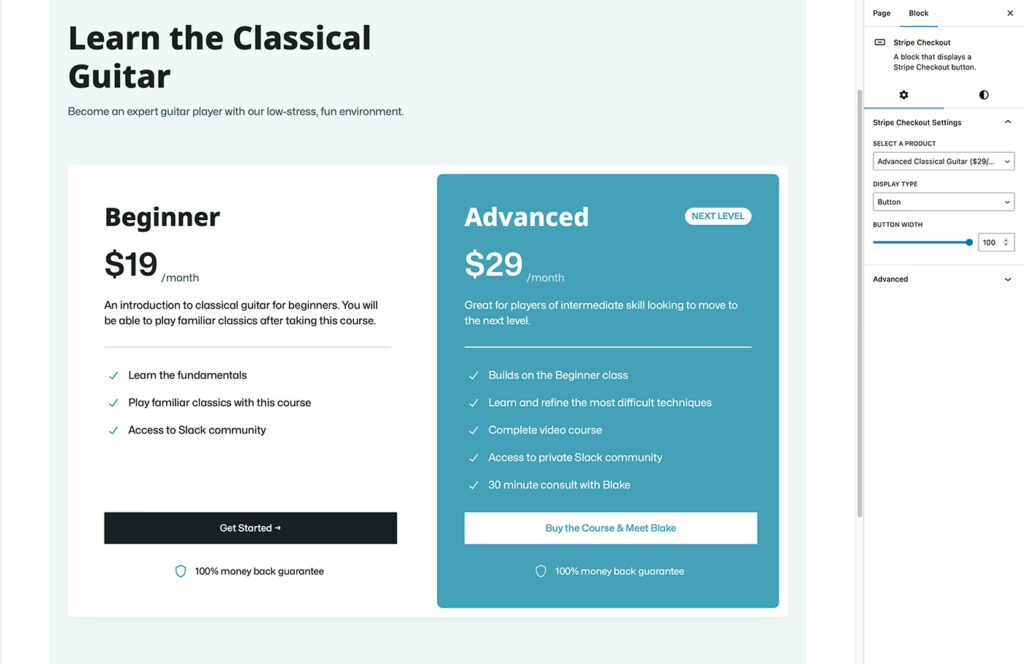
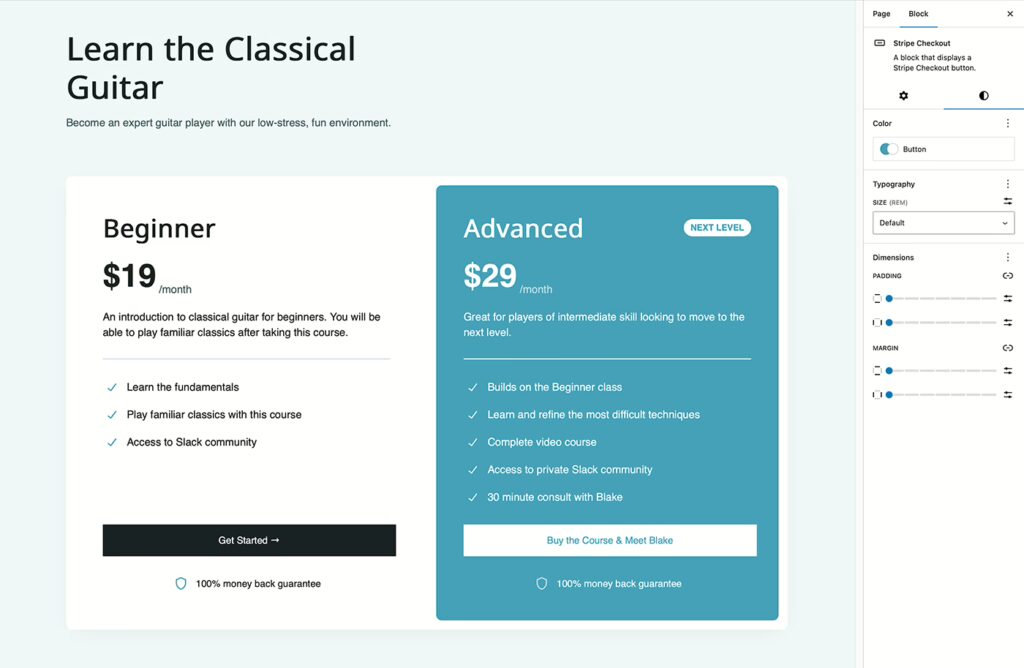
Click screenshots to enlarge
The Stripe Checkout block provides a way to add buttons and links to your page that take users to the hosted Stripe checkout page to purchase your membership plan. Products and Prices must first be defined in Stripe beforehand.
As of v1.6.0, the Stripe Checkout block also supports Stripe Coupons, allowing members to apply fixed or percentage discounts, either one-time or recurring, directly in Stripe Checkout.
When you add the block to a page, you select which Product it is linked to. This makes it easy to create pricing table pages, or custom one-off links/buttons for users to sign up for a membership.
The block also provides you ways to control the display type (button or link), button width, colors, font size, line height, spacing, and more. The Stripe Checkout block gives you full control over the design aspects, so it can fit right in with your site’s design.
Coupons in Stripe Checkout
To use coupons:
- Create a Coupon (and any related settings for one-time vs recurring discounts) in your Stripe dashboard.
- Create a Promotion Code for that coupon (this is what members type during checkout).
- In WordPress, enable coupon support in the Stripe Checkout block settings for the button/link you’re placing.
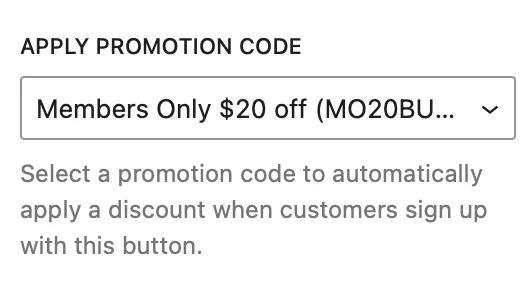
Stripe will apply the discount automatically.
On the front end of your site, the button provides the following functionality when clicked:
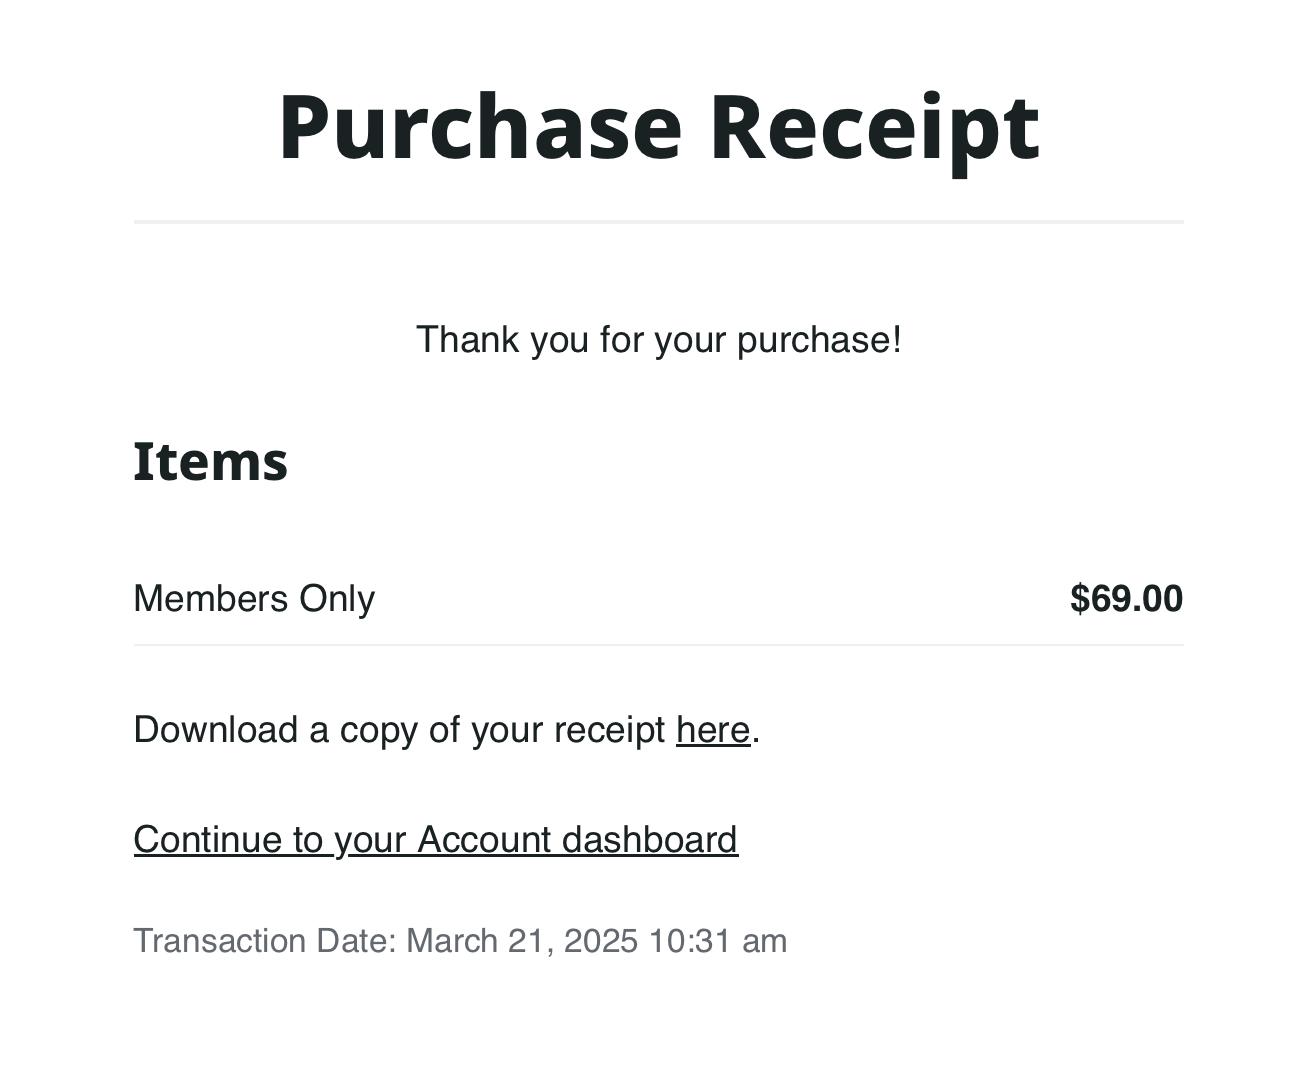
If the user is already logged in to their account on your site, they are immediately taken to Stripe’s hosted checkout page to complete their purchase.
Once payment is completed, the user is brought back to your site, where they will see a receipt for their purchase and a link to view their Account dashboard.
If the user is not logged in, the following happens:
The user is asked to enter their email address
- If a user with that email exists, a login form is displayed so they can log into their account. Once they log in, they are automatically taken to Stripe to complete the purchase.
- If a user with that email does not exist, a registration form is displayed which asks the user to confirm the email they just entered by typing it in again. This confirmation step verifies the spelling matches in both entries. Once they do that, a new user account is created in the background, the user is automatically logged into the new account, and the user is automatically taken to Stripe to complete the purchase.
Once payment is completed, the user is brought back to your site, where they will see a receipt for their purchase and a link to view their Account dashboard.
- They are taken to Stripe’s hosted checkout page to complete their purchase.
- Once payment is completed, the user is brought back to your site, where they still see a receipt for their purchase and a link to view their Account dashboard.
In all cases, if the user does not complete the purchase at Stripe and clicks the “Back” link on Stripe’s checkout, they will return to your site with a message about the purchase not being completed.