Learn how to connect your site to Stripe.
Test Mode
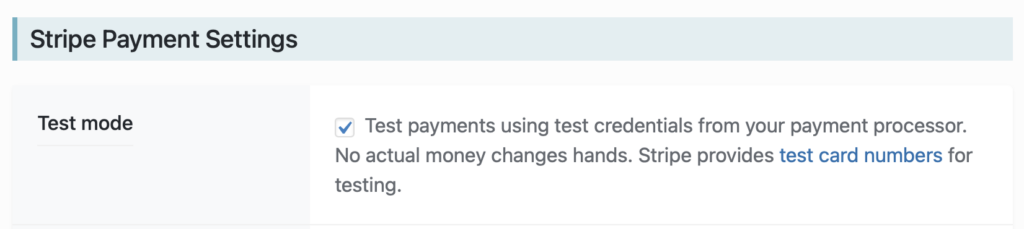
Stripe provides a Test Mode you can use for testing your site’s integration with the Stripe platform. This is great for testing payments on your site before launching it into production.
When Test Mode is enabled in Members Only, you can make test payments using example credit cards Stripe provides for testing. The transactions are mocked and no actual money changes hands, but it works the same and lets you confirm things are working and get a feel for the flow before going live.
Enable Test Mode in Members Only by selecting the checkbox.
Stripe API Keys
To connect your Stripe account Members Only, you need to enter your Stripe API keys in the Members Only settings page on your WordPress site. You can get your Stripe API keys from your Stripe account dashboard.
These API keys are required for Members Only to communicate with Stripe, for things such as:
- Retrieving a list of products and related prices, which is used in the Stripe Checkout block so you can select which Product and Price the button is for.
- Retrieving a checkout session to determine if it was successfully completed.
- Retrieving the list of subscriptions and their statuses for display in a member’s Account dashboard.
- Cancelling a subscription if a member chooses to cancel in their Account dashboard.
- Creating the required webhook so Stripe can send events to your site.
- Processing webhook events that Stripe sends to your site.
You need to configure all of these keys for Members Only to work in both Test and Live modes. (Live mode is when Test mode is turned off.)
Once you have copied your API keys to the Members Only settings page, scroll to the bottom and click Save Changes.
When you click Save Changes above, Members Only will do the following:
- Save the API keys you provided
- Check to see if your Stripe account has the Webhook entry (see Webhooks below) required by Members Only to process events that Stripe sends to your site.
- If the webhook does not exist, Members Only will create it, get the Webhook Signing Secret from the webhook that was just created, and save the Webhook Signing Secret to your Members Only settings.
When the settings are saved, Members Only reloads the settings page. You can then confirm that the API keys were saved and the Webhook Signing Secret was also saved.
Webhooks
When events happen in your Stripe account, such as a purchase, subscription renewal, subscription cancellation, etc. it will send a webhook to your site. Members Only listens for these events and uses them to ensure the membership features of your website are operating properly.
For example, if a user’s membership to your site expires, Members Only will use this event data to ensure the user can no longer access member-only content the next time they log in.
When Stripe sends a webhook to your site, Members Only checks the payload for the Webhook Signing Secret and verifies that it matches. If it doesn’t match, Members Only will ignore the webhook event. This prevents spoofing attempts by hackers and ensures Members Only processes only legitimate webhooks.
Note: if you “roll” or change your Webhook Signing Secret on the Stripe side, you will need to copy the new one to the Members Only settings page. Stripe does not send the updated secret via webhook to your site, therefore the only way for Members Only to know about that change is for you to update the value in the Members Only settings page. If you do not provide Members Only with the updated Webhook Signing Secret, webhook events will not be processed.
Troubleshooting Stripe Webhooks
Learn how to diagnose issues where memberships aren’t activating, cancellations aren’t reflected, or renewals aren’t updating as expected.
Overview
Members Only relies on Stripe webhooks to stay in sync with subscription and payment events.
If webhooks aren’t being delivered or aren’t being validated, you may see issues like:
- New purchases not granting access
- Renewals not updating membership status
- Cancellations not being reflected correctly
- Payment failures not being recorded
Quick Checklist
Start here — these fixes cover most issues.
1) Confirm Stripe API Keys Are Saved
Go to:
Settings → Members Only → Stripe Payment Settings
Confirm your Stripe API keys are saved correctly for the mode you’re using (Test vs Live).
2) Confirm Webhook Signing Secret Is Set
Members Only uses a webhook signing secret to verify Stripe events are legitimate.
- If the secret is missing, webhooks will not validate.
- If the secret doesn’t match Stripe’s current secret, webhooks will be ignored.
3) If You Rolled the Webhook Secret, Update It
If you “roll” or change the webhook signing secret in Stripe, you must copy the new value into Members Only.
Stripe does not automatically push updated signing secrets to your site.
4) Check Stripe’s Webhook Delivery Logs
In Stripe, go to:
Developers → Webhooks → (your endpoint) → Recent deliveries
Look for:
- HTTP 200 responses (good)
- HTTP 401/403 (blocked or auth issue)
- HTTP 404 (endpoint not found)
- HTTP 500 (server error)
- Timeouts (server blocked or slow)
Stripe’s delivery log is the fastest way to see whether the problem is “Stripe can’t reach the site” vs “site receives it but rejects it.”
Test Mode vs Live Mode Issues
A common source of confusion is mixing keys and webhooks across modes.
- If Test Mode is enabled in Members Only, use test API keys and test events in Stripe.
- If Test Mode is disabled (Live mode), use live API keys and live events.
Testing Webhooks While Running in Live Mode
Members Only includes a Test Webhook Signing Secret field so you can test Stripe webhook delivery without swapping your production secret.
General workflow:
- Keep Members Only in Live mode
- Paste your Stripe test signing secret into the Test Webhook Signing Secret field
- Use Stripe’s “Send test webhook” feature
- Confirm deliveries succeed
- Remove the test secret when finished
Common Causes (and Fixes)
Secret mismatch
Symptom: Stripe shows deliveries, but your site behaves as if nothing happened.
Fix: Confirm the signing secret in Members Only matches Stripe’s current webhook signing secret.
Site blocks inbound requests
Symptom: Stripe deliveries show 401/403, timeouts, or connection failures.
Fixes to check:
- Basic auth / maintenance mode plugins
- Security plugins or web application firewalls
- Reverse proxy rules (Cloudflare, etc.)
- Server-level blocks
Server errors (500)
Symptom: Stripe deliveries show HTTP 500.
Fix:
- Check your server error log
- Enable WordPress debugging temporarily if needed
- Confirm you’re running the latest version of Members Only
Developer Tip: Logging Webhook Events
If you want deeper visibility, Members Only provides action hooks fired when Stripe events are processed. You can use those hooks to write to your logs during troubleshooting. See our Actions and Filters documentation.